Category: Garden

Best Garden Tools

Garden Tools

Every gardener needs the best tools available to help them do their job. This article is designed to give you some insight on what items are essential for your garden toolkit—and which ones can be left behind!

As a garden owner, you have certainly seen one or two garden tools and know exactly what you need them for. However, there are also garden tools that are not so well known. Here we present all the common garden tools and explain what is used for what.

(more…)

By October 7, 2021.  No Comments on Best Garden Tools  Garden   

How to Make a Homemade Vermicompost

Worm composter

Living a zero waste lifestyle means you start going to the store with your string bag, buy recyclable food and put it in separate collection bins, but still a lot of food waste remains in the bin.

What is a vermi farm

A home worm farm is a closed unit of several boxes in which compost worms live. Without noise and smell, the worms eat food waste and turn it into fertilizer – biohumus. The same thing happens in nature: compost worms live in the upper layer of the soil, eat fallen leaves, blades of grass and other obsolete parts of plants, turning them into a fertile layer of earth.

Buy or do it yourself

You can choose a worm composter. Yes, there is a demand for them: they buy vermicomposters to get natural fertilizer or earn extra money selling worms (for example, fishermen and followers of organic farming are in demand).

You can assemble the vermicompost yourself from the plastic boxes. The number of boxes depends on the amount of waste – the more food waste you accumulate, the more boxes you need. You can start with two or three boxes, and then increase the number of tiers, for example, to five.

Take several plastic boxes (it is better to take opaque plastic, in nature compost worms live in the dark), one lid for the box, a thin awl or a sharp knitting needle. Make holes in the lid and in all drawers except the last one – they are needed for air exchange. The diameter of the holes should be small – no more than 1-2 mm, otherwise flies can fly into the composter.

The first tier is a container without holes, it is needed to collect excess liquid, insert “working” trays with holes on top and cover with a lid. The composter is ready!

Place in the kitchen, in the hallway, under the table

Place the composter where it is convenient. For example, in the kitchen to immediately send food waste to it, or wherever there is space: in the hallway, on the floor in the dressing room, under the table or in the closet under the sink. During warmer months, the composter can be placed on the balcony.

Note: Compost worms love darkness. If the plastic is not transparent, then the composter can be placed in an open space, if transparent, then in a dark place (in a closet or closet).

Where to get worms

The number (or rather the mass of worms, because no one will count them individually) depends on the volume of food waste. It is best to start with a small number of worms, get comfortable and then expand the population.

For home composting, specially bred Californian worms, domestic “prospectors”, compost worms and so-called fishing worms are suitable.

Where to get compost worms:

  1. Ask a friend of the vermi-farmer.
  2. Dig up: at the dacha in a compost heap or in a litter in a park, garden, forest.
  3. Buy “worms for fishing” in a fishing store. (It is “for fishing”, bloodworms and maggots are not suitable!)
  4. Order from an online Californian or artisan shop.

How to start a vermi farm

First, prepare the base substrate – it is needed to maintain stable conditions in the composter. The substrate retains moisture and provides air exchange. Dry decayed foliage, waste paper and sawdust will do. Torn newspapers, napkins, paper, egg trays and boxes can be used.

Fill the “working” tray with a third of the substrate, moisten from the sprayer. Then place the worms in the tray and add something sweet, like a little fruit peel – the sugary fruit harbors more microorganisms needed to create a comfortable environment. Don’t feed the worms for 2-3 days.

After 2-3 days, start feeding in small portions: do not add new food until the old one has disappeared by at least three quarters. When introducing feed, add a drop of substrate to it: the worms are accustomed to eating only what lies in the ground, and not on the surface. When the working tray is full, leave it to ripen and place the next layer.

The worms calmly experience loneliness: you can load the composter with food and leave for two or three weeks, they will have something to do.

The worms will reproduce until they reach a stable population. In other words, do not be afraid of overpopulation: they themselves regulate the number depending on the amount of feed, area and number of trays.

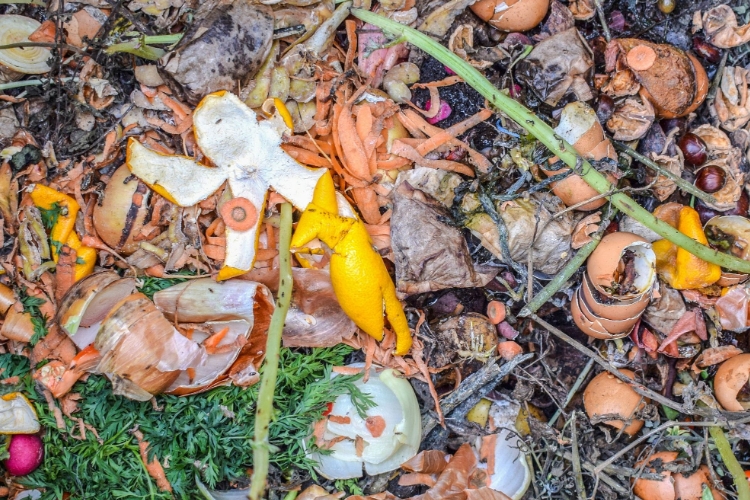
Worms eat any plant waste.

Tea leaves, coffee grounds, peelings and seeds of vegetables and fruits, food leftovers. Do not put waste from meat and fish – when decomposed, they will attract pests and will smell very bad.

What could go wrong

If the composter is tightly covered with a lid, and an environment is created there (humidity, sufficient air, substrate and feed), then the worms will live comfortably and will not climb onto the walls or cover of the composter.

Molds and parasites (mites, springtails, other types of annelids) can appear in the composter due to excess feed or excess moisture. They get there with the remnants of fruits and vegetables, but they do not harm the worms and the quality of vermicompost and participate in the process of organic decomposition. If you find it unpleasant to deal with them, the tips in the Compost Worms in Your Home group will help.

What to do with biohumus

Vermicompost can be used for feeding indoor plants or as fertilizer in the country. If you have neither flowers nor a summer cottage, you can take the vermicompost to work and feed the plants there or sprinkle it on the lawn near the house – any soil needs fertilization.

Asparagus Growing

growing asparagus

How to grow asparagus in the garden. How to keep the harvest

Asparagus is one of the most delicious, healthy and expensive vegetable crops. Asparagus is also one of the earliest vegetables of the new season: along with rhubarb, we start harvesting young asparagus shoots in April.

Asparagus (Asparagus officinalis) belongs to the asparagus family (previously it was referred to the lily family, but later the classification was changed). Asparagus grows throughout Europe, western Asia and northern Africa. Asparagus has been known to people since ancient times. Previously, asparagus was cultivated for medicinal purposes, as a diuretic and blood purifier. During the Renaissance, asparagus was declared an aphrodisiac and therefore banned from the use of monks (a fact that makes modern people smile).

Young tender asparagus shoots that have just emerged from the ground are used for food. As soon as the leaf buds on the shoot begin to bloom, the shoot becomes denser, tough and unsuitable for eating. In addition to outstanding useful and gastronomic properties, asparagus is an ornamental crop, which is used in floral arrangements (many are familiar with the delicate “Christmas trees” with orange berries in flower bouquets).

Asparagus is a perennial dioecious plant that can be easily grown in the garden, but it takes a lot of space to successfully cultivate it. Plants that have reached their peak fruiting yield about 9-12 shoots per season (enough to make just 2 servings of vegetable side dish!). Such a modest yield and a short shelf life, when large areas are required and manual harvesting, explains the high cost of asparagus compared to other vegetables.

Modern asparagus varieties are mostly male open-pollinated first-generation hybrids – they are more productive, do not produce seeds and do not self-seeding. The shoots of the male asparagus plants are thicker and stronger and the female ones are thinner, although the female plants produce more of them. When choosing asparagus varieties for a private garden, give preference to high-yielding, frost-resistant and disease-resistant modern hybrids: Jersey Giant, Jersey Knight, Jersey Prince, Syn 53, Syn 4-362, UC 157, Viking KBC. If you want to see berries at the end of summer on a female asparagus plant, then plant at least one next to the male ones, and … get ready to fight massive self-seeding.

Growing asparagus

For planting asparagus, choose a calm and sunny spot somewhere at the back of your garden. Asparagus can live in the garden for up to 20-25 years without the need for transplants. Prepare pits measuring 30 by 30 cm, which should be filled with a mixture of rotted manure, garden compost, and soil.

You can sow asparagus with seeds in early spring, but you can get a faster harvest from a young plant or the root of a plant purchased from a garden center. Plants are planted at a distance of 40-45 cm from each other. Caring for asparagus is quite simple: manual weeding, fertilizing plants before (early spring) and after fruiting with well-rotted manure or mineral fertilizers, as well as autumn mulching with a thick layer of natural materials (leaf humus, wood chips, crushed bark, etc.). Before mulching, the yellowed asparagus is cut to the root.

You can harvest the first crop of shoots from asparagus that has reached 3 years old. Shoots are cut, 15-20 cm long from the ground, within 4-6 weeks from the beginning of fruiting. Asparagus can be harvested from older plants within 8-10 weeks. For harvesting, use a special asparagus knife that can easily cut offshoots 2 cm below the ground, or simply break them off with your hands near the ground.

Storing and preserving asparagus

The harvested asparagus is best consumed immediately, as storage degrades the nutritional quality of the vegetable. To preserve the asparagus crop for several days, treat the shoots as if they were fresh flowers: refresh the cuts and place them in a glass of water. The water should cover the base of the shoots by a couple of centimeters. Cover the glass with plastic wrap and store in the lower compartment of the refrigerator.

Canned asparagus loses significantly in nutritional value, appearance, and most importantly – in its amazing taste. The most gentle method of preserving asparagus is quick freezing. Pour boiling water over washed shoots with fresh cuts for 3 minutes, then discard the asparagus in a colander and pour over with cold water to stop the cooking process. Drain the water, wrap the shoots in freezer bags and remove the air from them. Sign the asparagus bags and place in the freezer.


By July 31, 2020.  No Comments on Asparagus Growing  Garden